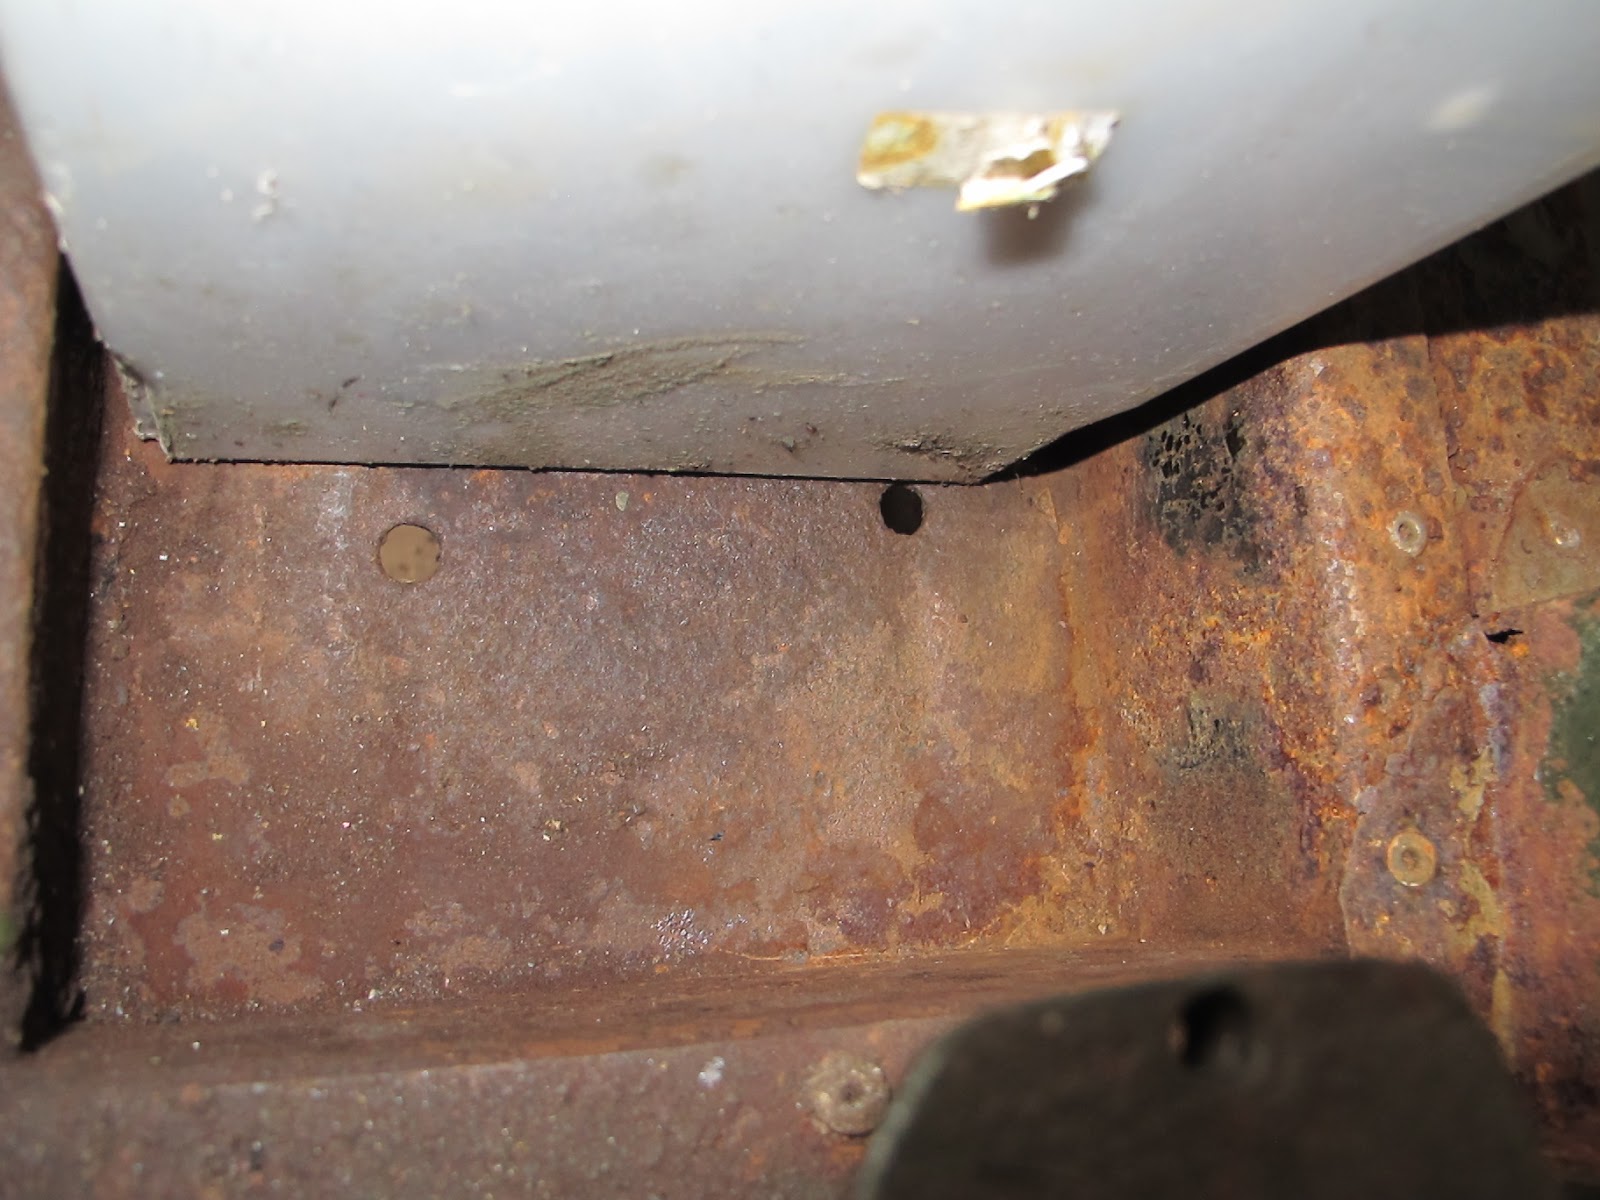
Well, a short but decent few hours of painting. After getting thr drill and wire brushes out to get rid of all the rust, on with the Hammerite 'No 1 rust beater' as a base coat! Problem is now everywhere else is covered in rust dust!
Metal prepared:
Metal painted - at least with the beige colour, I can see where I've been!
A final minor job was to put on another pedal rubber on to cover the hole in the floor around the clutch pedal. The original was long gone and as you can see from the remaining old version on the brake (to the left), little wonder.....:
The delights of restoring GYL 32C - one of only six Bedford RL petrol Carriers made for the Auxiliary Fire Service
Friday, 9 August 2013
Thursday, 8 August 2013
Prepare the way...
In preparation for tommorrow's paint-a-thon on the cab floor, I popped up today to take the paint and equipment up as well as to do some odd jobs.
First job was to wash the battery tray out with some water and washing up liquid (which is slightly alkaline) to ensure that any acid remnants are gone before being covered with paint! After a good slosh around with fresh water to rinse, I've left this over night to dry....
Then I straightened out the seat box fully to ensure the seat base sits properly when it goes back on. Tony had done most of this down in Suffolk (it was a bit knarled when we got it) but there were a few dings still to tease out:
That done, it was time to give the chrome at the front a polish and much better it looks too although a coat of Colinite when it's washed will improve it still further!
Hopefully some painting news tomorrow!
First job was to wash the battery tray out with some water and washing up liquid (which is slightly alkaline) to ensure that any acid remnants are gone before being covered with paint! After a good slosh around with fresh water to rinse, I've left this over night to dry....
Then I straightened out the seat box fully to ensure the seat base sits properly when it goes back on. Tony had done most of this down in Suffolk (it was a bit knarled when we got it) but there were a few dings still to tease out:
That done, it was time to give the chrome at the front a polish and much better it looks too although a coat of Colinite when it's washed will improve it still further!
Hopefully some painting news tomorrow!
Tuesday, 6 August 2013
Unpretty...
A busy couple of days and all appears to be well at last. After the problems of matching the two manifolds, Tony dropped by yesterday and we fitted the new exhaust manifold that he had found at Chris Morter's place in East Anglia. It went back on quite well, although a stud which fastens the inlet manifold on did break necessitating a dash around Grantham to find a replacement bolt or stud bar. That replaced, on went the carburettor and the throttle linkage was reattached. After a few turns, it fired up and quickly settled to a decent tickover, which then demanded a test drive. I have to say, it's decent to drive and flies along, of course much more quietly with the manifold and exhaust not blowing! A good 25 miles round trip told us that everything was OK! One thing we did add this time was a gasket between the manifold and block, just in case. These were purchased on eBay and appear to be NOS although not made by Bedford; they were marked up as being for the S type, the RL's smaller brother. With the petrol carrier's penchent for rasping, we figured that it might be a good idea. Seems fine now, time will tell I guess....
The copper gasket in place with added gunk:
The gaskets as they arrived:
All back together again!
With the 'can carrier' now running again, Operation TLC can begin! The old thing hasn't been loved for a while really, so I started today with a good clear out of the cab. There was a decent accumulation of dust and muck in most areas but especially the 'hard to get to' areas under the seats and behind them. The Dyson soon sorted that out although the clearance did reveal a good deal of surface corrosion under both seats but especially around the battery box under the passenger seat. This will need dealing with pretty soon before holes appear!
Under the driver's seat before:
...and after:
Behind the engine cover:
Corrosion around the battery box which will need painting:
I also carried out a few other tasks such as scraping the overspray from the chrome radiator grille surround at the front as well as rebuilding the driver's seat back - the random piece of metal rod that I almost threw away wasn't quite as random as I'd thought.....
The copper gasket in place with added gunk:
The gaskets as they arrived:
All back together again!
With the 'can carrier' now running again, Operation TLC can begin! The old thing hasn't been loved for a while really, so I started today with a good clear out of the cab. There was a decent accumulation of dust and muck in most areas but especially the 'hard to get to' areas under the seats and behind them. The Dyson soon sorted that out although the clearance did reveal a good deal of surface corrosion under both seats but especially around the battery box under the passenger seat. This will need dealing with pretty soon before holes appear!
Under the driver's seat before:
...and after:
Behind the engine cover:
Corrosion around the battery box which will need painting:
I also carried out a few other tasks such as scraping the overspray from the chrome radiator grille surround at the front as well as rebuilding the driver's seat back - the random piece of metal rod that I almost threw away wasn't quite as random as I'd thought.....
Friday, 12 July 2013
Exhausting foreplay...
Ever since we took delivery of 32 it has had the unfortunate problem of it blowing exhaust gases out of the manifold, meaning that it's not running efficiently and also it's bloomin' noisy in the small cab as the manifold sits just under one side of the engine cover.
Many RLs 'blow' to a certain extent but this one was something else! When Tony removed the exhaust manifold during the rebuild, he found that it was a later three-piece version designed later in the RL's life to combat cracking of the cast metal on the one-piece version. Over time, the joints wear down so once back together, it just blew most of the gunk out of all the joints, leaving it as noisy as before.
But on rebuilding another RL for someone else, he came across a scrap engine from a 4x2 green goddess. The more reliable one-piece exhaust manifold was removed (the inlet was beyond saving sadly) and cleaned up, ready for fitting today. So far, so good...............
Once the manifolds were removed, the situation looked like this - you can see the remains of much of the exhaust putty....:
Great - here's the three-piece manifold off....:
Here's the one piece manifold ready to go on.....:
But - a problem....! Here are the inlet manifold studs on the old three-piece exhaust manifold. Note they're in a rectangle:
Here are the inlet studs for the one piece version. Note they're in a diamond shape.....:
Anyway, that's now a job to be completed on another day once we either have a new inlet manifold which fits or a new exhausat manifold which matches the current inlet....
Strange - why did Bedford change them when they moved to a three-piece unit?? Must have made sense to someone, somewhere!!
Whilst I removed the old manifold, Tony also rebuilt the carburettor with new gaskets etc.
Many RLs 'blow' to a certain extent but this one was something else! When Tony removed the exhaust manifold during the rebuild, he found that it was a later three-piece version designed later in the RL's life to combat cracking of the cast metal on the one-piece version. Over time, the joints wear down so once back together, it just blew most of the gunk out of all the joints, leaving it as noisy as before.
But on rebuilding another RL for someone else, he came across a scrap engine from a 4x2 green goddess. The more reliable one-piece exhaust manifold was removed (the inlet was beyond saving sadly) and cleaned up, ready for fitting today. So far, so good...............
Once the manifolds were removed, the situation looked like this - you can see the remains of much of the exhaust putty....:
Great - here's the three-piece manifold off....:
Here's the one piece manifold ready to go on.....:
But - a problem....! Here are the inlet manifold studs on the old three-piece exhaust manifold. Note they're in a rectangle:
Here are the inlet studs for the one piece version. Note they're in a diamond shape.....:
Anyway, that's now a job to be completed on another day once we either have a new inlet manifold which fits or a new exhausat manifold which matches the current inlet....
Strange - why did Bedford change them when they moved to a three-piece unit?? Must have made sense to someone, somewhere!!
Whilst I removed the old manifold, Tony also rebuilt the carburettor with new gaskets etc.
Monday, 8 July 2013
Derby Emergency Services Show
Well, after all the months of
spending and hard work (the latter mainly by Tony....), 32 made it's official
first outing at the Derby Emergency Services Show in mid-June.
The aim was to get a large gathering of ex-AFS vehicles for static showing and later the ring display. This we achieved as we had many varieties of AFS vehicles from many parts of the midlands and north, my own 326 included.
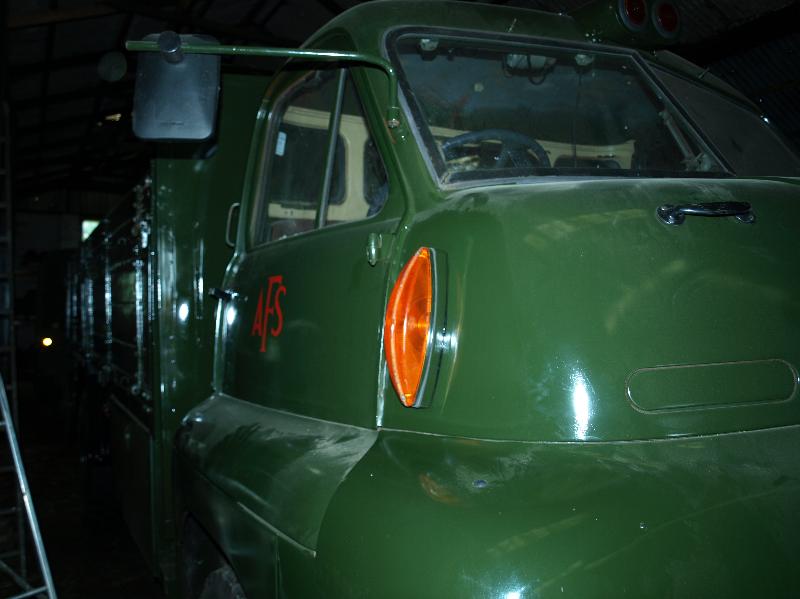
As you can see, 32 has been fully repainted and sign written. The tilt frame we had to have made from scratch using an original from another RL as a copy. The indicators are back where the delivery pics provided by John Thompson (author of the ‘Green machine’) from 1965 show them to be (very few RLs had them on the cheek panels, only tankers and fuel vehicles it seems, for some reason now lost in the mists of time). We’ve also popped it onto larger tyres which improves the economy and road holding no end. The larger truck mirrors fitted by Clywd Fire Brigade have gone as have the two tones on the roof, leaving quite a few holes which needed filling. The exhaust is longer so it doesn’t feed into the cab through the floor – quite useful, that…. The flashing yellows work and we now have two vintage fire extinguishers to use to help construct the extinguisher holders that were on the front bumper. The canvas tilt will follow when funds allow….!!
We think it looks good! It goes like stink although it’s a trifle noisy as it’s blowing at the manifold so we’re replacing the troublesome three-piece exhaust manifold with a one piece item later this week….
Further progress updates as and when, the next planned outing is the Nene Valley Railway transport festival in late July.
More Derby photos can be found here:
http://www.flickr.com/photos/mj_100/sets/72157634141372659/
32 in action in the ring:
http://www.flickr.com/photos/mj_100/9063241218/in/set-72157634141372659
The aim was to get a large gathering of ex-AFS vehicles for static showing and later the ring display. This we achieved as we had many varieties of AFS vehicles from many parts of the midlands and north, my own 326 included.
As you can see, 32 has been fully repainted and sign written. The tilt frame we had to have made from scratch using an original from another RL as a copy. The indicators are back where the delivery pics provided by John Thompson (author of the ‘Green machine’) from 1965 show them to be (very few RLs had them on the cheek panels, only tankers and fuel vehicles it seems, for some reason now lost in the mists of time). We’ve also popped it onto larger tyres which improves the economy and road holding no end. The larger truck mirrors fitted by Clywd Fire Brigade have gone as have the two tones on the roof, leaving quite a few holes which needed filling. The exhaust is longer so it doesn’t feed into the cab through the floor – quite useful, that…. The flashing yellows work and we now have two vintage fire extinguishers to use to help construct the extinguisher holders that were on the front bumper. The canvas tilt will follow when funds allow….!!
We think it looks good! It goes like stink although it’s a trifle noisy as it’s blowing at the manifold so we’re replacing the troublesome three-piece exhaust manifold with a one piece item later this week….
Further progress updates as and when, the next planned outing is the Nene Valley Railway transport festival in late July.
More Derby photos can be found here:
http://www.flickr.com/photos/mj_100/sets/72157634141372659/
32 in action in the ring:
http://www.flickr.com/photos/mj_100/9063241218/in/set-72157634141372659
Thursday, 30 May 2013
I'm in pieces...
...not any more!! After painting, the vehicle is now back together again and looks fantastic! Although not exhaustive, the list of things to be done was large and included:
- New tyres - we've fitted 12.00 x 20 Goodyear G388s which are slightly larger and more modern
- The wheels have been painted
- Carburetter cleaned and rebuilt
- Manifolds cleaned and re-attached, a difficult job as the exhaust manifold is in three pieces and you need an octopus to help hold it and re-attach!!
- Exhaust painted in high temperature black
- The rear body has been re-attached
- The steps have been fitted to the tailboard
- Mudflaps fitted
- Radiator canvas cowel replaced (the last one was missing)
- The new indicators are fitrted together with the complex backing plates
- The headlining has been painted
- New wipers and arms fitted
- Tilt frame painted and fitted
- Flashing amber lights fixed and wired up
- Headlining painted
Friday, 3 May 2013
Subscribe to:
Posts (Atom)